
Skip to content

How to Make a Text Match Cut

Learn how to make a text match cut with one fixed word or phrase. Choose the look and pacing, preview the motion, and export the finished clip.

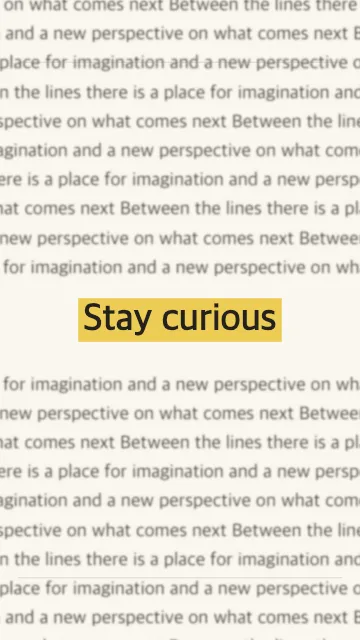
Paper-style animation with a fixed text anchor

Why the fixed text stays readable

The effect is built around one simple rule: the focal text stays in nearly the same visual position while everything around it changes. That stable anchor gives the viewer something to follow, so fast cuts still feel connected.

This text match cut tutorial uses the browser generator instead of a manual stack of screenshots. The generator creates changing layouts around your text while you control the style, aspect ratio, duration, cut speed, zoom and blur.

How to make a text match cut in 3 steps

Start with the focal text, shape the motion, then export the clip

1

1. Enter the word or phrase

Type the text you want viewers to follow. The generator accepts up to 40 characters, but one word or a short phrase is usually easier to read when the cuts move quickly.

2

2. Choose the style and pacing

Pick paper, book or typewriter, then choose 9:16, 1:1 or 16:9. Adjust duration, cuts per second, zoom and blur while you preview how the fixed text reads.

3

3. Export the finished video

Choose 720p or 1080p and MP4, WebM or Auto. Generate the clip, check the result, then download the actual format shown by the interface.

Choose text that can stay readable

The best focal text is usually the word the viewer should remember: a name, place, product, idea or short phrase. Longer text can work, but it has less room to breathe and becomes harder to scan on a phone.

Start short. If the preview feels cramped, reduce the phrase before changing every other setting. A strong result depends more on a clear visual anchor than on squeezing a full sentence into the frame.

Set the pacing before chasing effects

Use cut speed to decide how energetic the clip feels, then use zoom and blur to support that rhythm. A slower sequence gives each layout time to register; a faster sequence feels more like a hook or transition.

The generator supports 2–8 second clips and 2–12 cuts per second. Preview the motion at the size your audience will actually see. If the word is difficult to track, slow the cuts or simplify the phrase before adding more blur or zoom.

If you want the editorial paper look specifically, see the newspaper text animation guide for the Paper-style workflow and its limits.

Check the preview before you export

Typing updates the preview immediately, so use it as a reading test rather than treating preview as a separate generation step. Watch the focal word at the final aspect ratio. It should remain easy to find while the paper, book or typewriter layout changes. If your eye starts following the background instead, shorten the phrase, slow the cuts, or reduce blur and zoom.

For a vertical clip, also judge the 9:16 preview at roughly phone size. The focal word should stay recognizable without making you read the surrounding body copy.

Use New scenes when the wording is right but you want a different layout sequence. That changes the surrounding arrangement without changing the focal phrase. Before export, let the animation loop once at normal speed and check the first, middle and final cuts. Export only when the anchor is readable without pausing.

Export for TikTok, Reels, Shorts or your editor

Use 9:16 for vertical short-form video, 1:1 for square posts, or 16:9 for landscape projects. Choose 720p when you want a lighter export or are working on a slower device; choose 1080p when you want the higher-resolution version.

MP4 is the most convenient choice for many editing workflows, while WebM is available when your browser supports it. Auto tries an appropriate local format first. If local encoding is not available, the interface explains that your text and effect settings will be sent to temporary background generation before the task is submitted.

After download, import the clip into CapCut, Premiere, DaVinci Resolve, Final Cut or another editor that supports the exported format if you want to add music, captions or other footage. This tutorial produces the finished video asset; it does not replace a full timeline editor.

Common mistakes and how to fix them

Too much text. The focal phrase becomes difficult to recognize from cut to cut. Shorten it first.

Too much motion at once. Fast cuts, strong zoom and heavy blur can compete with the word you are trying to emphasize. Build the pacing first, then add motion gradually.

Choosing the wrong frame. A landscape export can be awkward inside a vertical edit. Pick the final publishing format before you fine-tune the animation.

Assuming every device encodes the same way. Browser and hardware support varies. If a local export is unavailable, use the background-generation option when the interface offers it, or try a shorter 720p clip.

Tutorial FAQ

Make your first clip

Start with one word or short phrase, preview the movement, and export the clip when it feels easy to follow.