
Skip to content

Text Match Cut in CapCut and Other Editors

Create a fixed-word clip, then fit it into CapCut, Premiere Pro, After Effects or DaVinci Resolve.

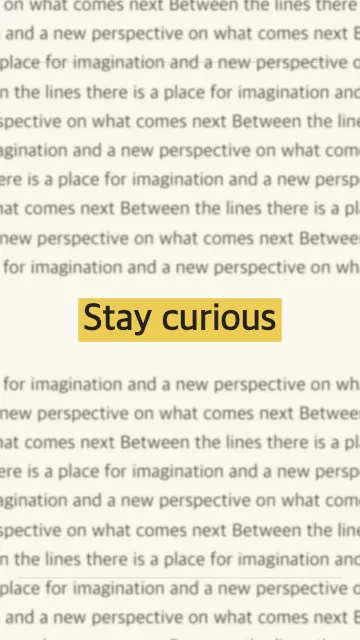
Paper-style text match cut with the focal word held in place

Choose a finished clip or build editable layers

A text match cut keeps one word in the same screen position while the surrounding page changes. There are two practical ways to make it: generate a finished clip and import it, or align a series of images manually in your editor.

Use the generator for an original paper, book or typewriter look without collecting and aligning documents. The download is a video with the word and background rendered together. It is not a CapCut template, Premiere project, After Effects composition or Fusion macro.

Build it manually when you need particular documents you have permission to use, separate layers or control over every individual cut. You will need to match the word's position and size on each image. The manual alignment checklist below explains that process.

Jump to CapCut, Premiere Pro, After Effects, DaVinci Resolve or manual alignment. These instructions describe desktop workflows; mobile layouts and panel names can differ. Official help links accompany each editor.

Prepare one source clip for any timeline

  1. Open the online generator, enter a sentence and select the focal word or a short phrase. Keep it short enough to read at the final viewing size.
  2. Choose Newspaper for an editorial paper look, Book for a printed-page style or Typewriter for monospaced text. Choose 9:16, 16:9 or 1:1 to match your edit before exporting.
  3. Try four seconds at four cuts per second as a starting point. This is a suggested setting, not a mandatory preset. Reduce speed, blur or zoom if the anchor is difficult to follow.
  4. Preview a complete loop, then generate and download the video. Try MP4 first for editing compatibility. The tool offers 720p and 1080p; check the actual completed file format in the interface.

The generator supports 2–8 second clips and 2–12 cuts per second. New scenes changes the surrounding layouts. To change the word, layout or internal cut speed after download, generate a new source clip. For the complete control walkthrough, see how to make a text match cut; for Paper-specific examples, see newspaper text animation.

If local export is unavailable, review the interface's explanation before using temporary background generation, which sends your text and effect settings. A moving preview is not yet an exported file. Open your download in a video player before importing it into an editor.

Text match cut in CapCut

  1. In CapCut desktop, choose Create project, then Import and select the downloaded MP4. Drag it from the media area onto the timeline.
  2. Place it before your main footage for an opening hook, or between two shots for a change of topic. Match the project ratio to your source so the word is not cropped.
  3. Trim the clip's ends by dragging its edges. Zoom into the timeline and position its start against a music transient or spoken cue. The generator does not automatically synchronize its internal cuts to your song.
  4. Add captions away from the focal word. If you add your own sound, mute or lower the imported clip's audio so two hits do not compete.
  5. Choose Export, review resolution, frame rate and format, then play the saved file outside CapCut.

The difficult part: auto reframing and transitions can move the entire clip, including the word. Start with a plain cut and a proportional frame. If the internal paper changes are too fast, regenerate at a lower cut speed; stretching the timeline clip changes all its motion together.

For a manual CapCut text match cut, import your permitted page images as consecutive clips. Select each image and adjust its position and scale until the chosen word matches the previous one. Use the same reference point throughout; the generator route skips this repeated alignment. See CapCut's official desktop guide for current import, timeline and export controls.

Create a text match cut for CapCut, then return here to place it in your edit.

Text match cut in Premiere Pro

  1. Use File → Import to bring in the clip. Open the destination sequence and drag the clip from the Project panel to the timeline at the intended cut.
  2. Select the timeline clip. Open Effect Controls → Motion and check Position and Scale. Preserve the letters' proportions rather than stretching a portrait clip to fill landscape footage.
  3. Trim the beginning and end, then move the clip so the entrance lands on your chosen sound cue. Listen with the neighboring shots, not just the animation in isolation.
  4. Keep captions on their own track and check that they do not cover the anchor. Adjust or mute the clip's audio if it overlaps your music.
  5. Export the sequence with the frame shape and resolution required by your destination. Check the final file for unexpected crop, black bars and audio timing.

The difficult part: scaling the finished asset changes the anchor and background together. A 1080p sequence does not restore detail lost in a smaller source. Export at the needed ratio and resolution first, and avoid unnecessary enlargement.

For a manual text match cut in Premiere Pro, put the page images in sequence and use Motion's Position and Scale on each clip to align the same word. Use a temporarily overlaid reference image with reduced opacity to compare the word bounds, then remove the reference before export. Adobe documents these controls in Apply Motion effect to clips.

Generate the source video for Premiere Pro if you want to avoid aligning every page yourself.

Text match cut in After Effects

  1. Import the downloaded video with File → Import → File. Drag the footage from the Project panel into your existing composition, or onto the new-composition button to start from the source dimensions.
  2. Select the layer and expand Transform. Adjust Position and Scale to fit the composition, keeping the word inside the intended frame. Press S to reveal Scale.
  3. Move and trim the layer to the intended moment. Treat the generated animation as one footage layer: its individual paper layouts are not separate text or image layers.
  4. Put additional titles or graphics on separate layers. Keep those elements clear of the anchor. Preview the composition at normal playback speed.
  5. Send the composition through your available render or Media Encoder workflow. Inspect the output dimensions, encoding settings and completed video.

The difficult part: time stretching changes the speed of every cut; it does not make the word independently editable. Regenerate to change the anchor or pacing. If your project needs transparent text over your own footage, build separate text layers instead: this generator's video includes a background.

For a manual text match cut in After Effects, add one image per layer, stagger their in/out points, and align each word with Transform's Position and Scale. Temporarily reduce the reference layer's opacity with T to check alignment, then hide that reference. Adobe's Add layers to a composition tutorial explains adding footage and the Scale/Opacity controls.

Create a finished clip for After Effects when you need the paper effect as a footage layer.

Text match cut in DaVinci Resolve

  1. On the Edit page, import your downloaded clip into the Media Pool, then drag it into the destination timeline.
  2. Select the timeline clip and open the Inspector. Under the Video tab's Transform controls, check Zoom and Position. Keep linked scaling proportional so the letters do not stretch.
  3. Trim its edges and place the entrance against your chosen music or dialogue cue. The paper changes are already inside the clip; a plain cut into and out of it is a useful starting point.
  4. Check titles, audio levels and the crop in context. Fusion is optional for additional compositing; you do not need a Fusion build just to place a finished clip.
  5. Use the Deliver page, review the output settings, add the job to the render queue and render. Play the saved result to check the transition and word clarity.

The difficult part: a timeline's scaling setting may crop a clip with a different aspect ratio. Correct the source ratio or scaling choice before adding motion. If the file will not import, first check that it plays independently; if a WebM export is rejected by your setup, request MP4 rather than renaming the extension.

For a manual text match cut in DaVinci Resolve, arrange the page images on the Edit timeline and use Inspector → Transform to align the word's size and position on each. Temporarily place a reference on a higher track to compare alignment, then disable it. Blackmagic's official training covers editing and delivery, and its reference manual details Inspector transforms.

Create a clip for DaVinci Resolve and use the Edit page to assemble the final sequence.

Manual alignment: match the word before adding motion

Use this checklist when you want actual documents or independently editable cuts. Source your own pages or images you have permission to use; a generated layout is a different kind of asset.

  1. Pick one short word that appears in every image. Choose a reference frame with enough space around it.
  2. Place guides through the word's center or baseline. Match the letter height as well as the position; aligning only the center can leave a distracting size jump.
  3. Adjust each image's scale and position while comparing it with the reference. Use temporary transparency or alternate the two frames to spot drift. Check the first, middle and final letters.
  4. Arrange the images as consecutive hard cuts. Decide the timing only after the anchor reads consistently; shorter shots leave less time to recover from poor alignment.
  5. Remove reference layers and guides from the output. Watch at phone size, then add restrained motion or sound if it improves the sequence.

The surrounding lines, paper edges and type can change. What matters is that the selected word remains easy to find. If you want to understand the broader editing idea, read what is a match cut? For a faster generated version, return to the text match cut generator.

Fix import, framing and timing problems

The editor rejects the file: confirm the download completed and opens in a player. Try a fresh MP4 export if WebM is unsupported. Changing the filename from .webm to .mp4 does not convert it.

The word disappears near an edge: reset cropping and animated transforms, then compare the source and project ratios. Regenerating at the destination ratio is usually clearer than enlarging the wrong frame.

The word moves after adding a transition: the transition acts on the whole frame. Test with a hard cut, then add only movement that keeps the word readable.

The cuts miss the beat: move the clip entrance first. The internal cuts follow the generator's cuts-per-second setting, not your music. Regenerate at a more suitable pace or build individual cuts manually when every beat must line up.

The word looks soft: check the source resolution, preview quality and export scale. Choose a larger source if needed and inspect the actual output, since a low-quality editor preview can look softer than the final render.

Text match cut editor questions

Start with a readable source clip

Choose a focal word, preview the layouts and download a video for your editor.